Observing nature is one of the most enjoyable parts of spending time outdoors. It’s also a key part of being a naturalist. This is true whether you’re a professional, a dedicated hobbyist, or a curious hiker or gardener. However, there are limits to what our eyes can observe. To look at things that are far away or difficult to approach, we typically use binoculars. But what about people who are interested in other aspects of nature? If you want a better look at objects that are close-by, you’ll want to bring along a magnifying glass. In this second installment of the Beginner Naturalist Tips series, I’ll show you how to use a magnifying glass.
A closer look

Rather than making an object that is far away appear closer, a magnifying glass enlarges an image of an object that is already close at hand. In this way, it will help you notice details, colors, features, and structures you may not see with the naked eye. This type of tool is excellent for studying things in nature that can’t move, for example:
- Wildflowers
- Fungi
- Bugs (if dead or captured)
- Bird feathers
- Trees (branches, leaves, and bark)
- Scat (animal poop)
- Fur or bones
I didn’t start carrying a magnifying glass around with me until I made some botanist and entomologist friends with whom I could nerd out about flowers and bugs. Now, it’s a trusty part of my naturalist gear that helps me get a new perspective on things I find in nature.
Plenty of names
Depending on where and how they are used, magnifying glasses go by a lot of different names. Most often. Other names include:
- Hand lens
- Magnification loupe
- Hand loupe
- Botany loupe
- Hand glass
While ‘loupe’ typically refers so a specific type of magnifying glass, these various types, and how to choose your own, is a topic for a future post. In this post, I’ll show you how to use a magnifying glass to get a closer look at objects in nature. Before getting started, it’s good to take care of some simple prep work first.
Identifying your dominant eye
Just like people are right- or left-handed, you also have an eye that you habitually prefer over the other. This is known as your dominant eye. When you’re properly using a magnifying glass, you can only use one eye at a time. Because of this, you’ll want to make sure that you’re holding it up to the eye you find it easiest to look with.

I use this easy trick to help people find their dominant eye:
- Take one or both hands, and make a circle with your fingers that you can look through
- Hold out your arm(s) and look at a stationary object through the window between your fingers
- Close one eye, and then the other. Do you see the object when one eye is closed, but not the other?
- If not, make the window smaller with your hands, or choose a smaller stationary object, then try again.
- The eye that can still see the focal object when the other is closed is your dominant eye.
This trick works because our brains instinctively align our dominant eye with an object that we’re looking at. By using our fingers to shrink the field of view, we accidentally block out non-dominant eye’s field of view to the object.
How to use your magnifying glass
Once you’ve figured out your dominant eye, the rest is pretty easy. When you’re choosing something to look at with your magnifying glass, I recommend you choose something that is:
- Stationary (standing still)
- Small enough to hold in your hand
- In good light (sunlight or well-lit indoors)
Hands-on seeing
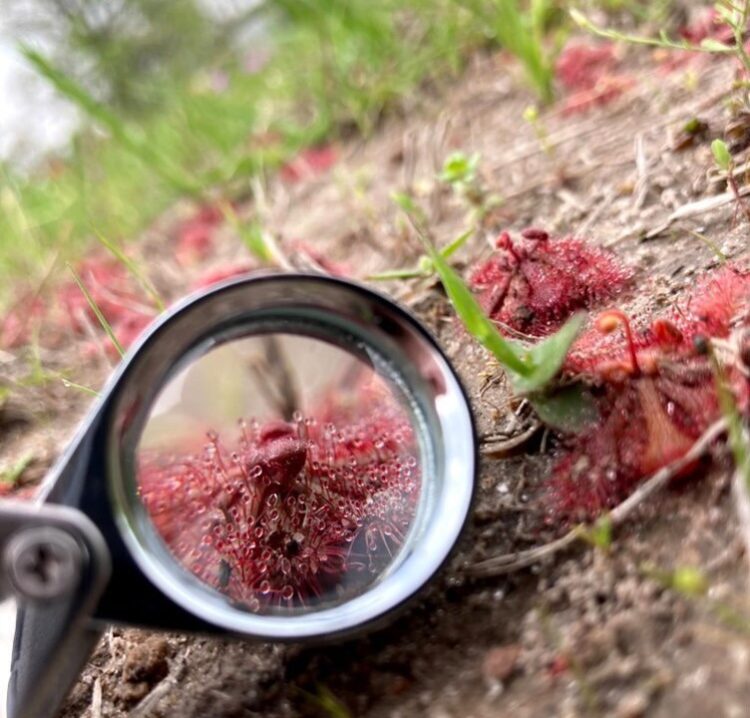
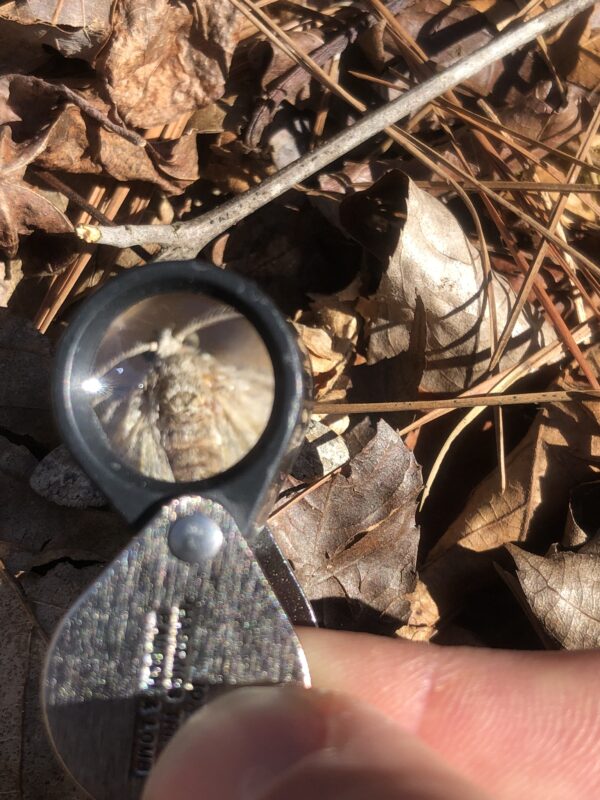
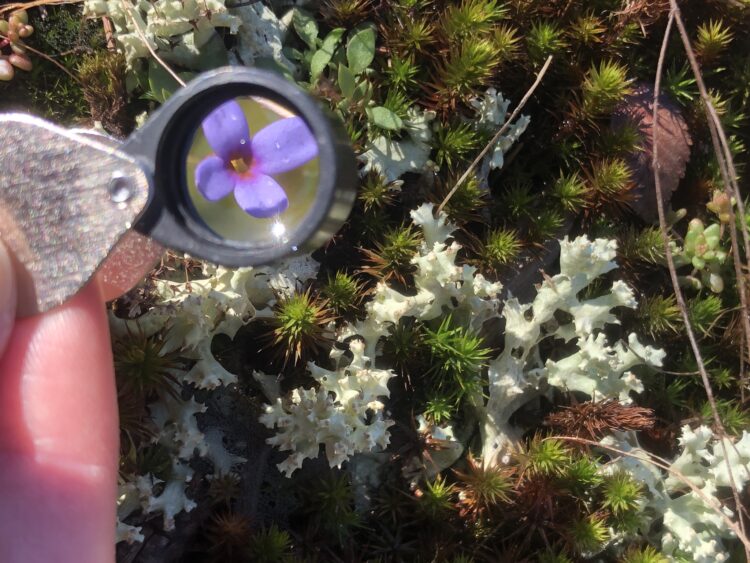
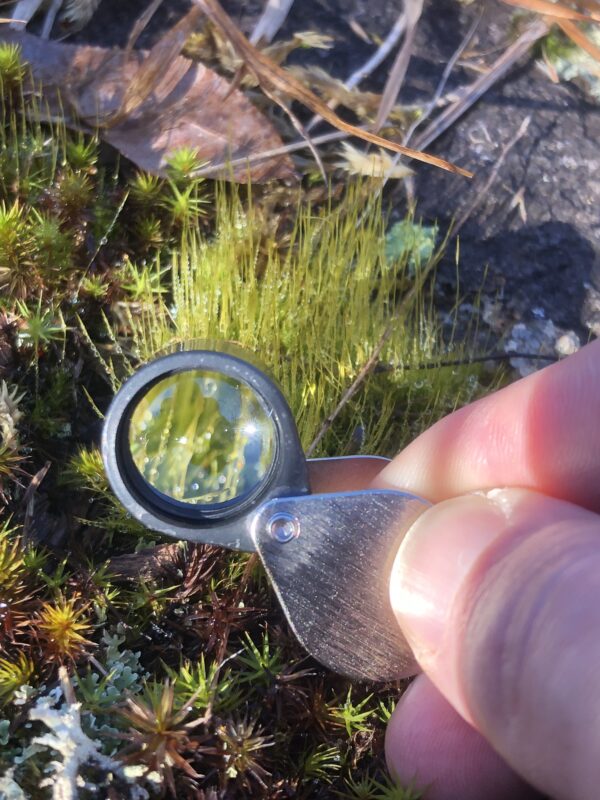
The easiest way to look at something with a magnifying glass is to hold it in your hand. That way, you can move it around in front of your eye and the glass to get a clear, focused image. Unlike binoculars that have a focus knob, magnifying glasses only focus at a particular distance. In other words, you’ll need to bring the object to the lens to see it well. Consequently, it is much easier at the beginning to pick something up and examine it, than to try to learn over a flower or dead bug with your hand lens.
An important note: try to avoid picking leaves or flowers from living plants. It is a crime in many parts of the world to do this without a permit if the species is endangered or protected. Even if it isn’t, it can be harmful to the plant or fungus if you remove part of it. So avoid picking parts of plants and other organisms. I recommend starting by starting with dead or fallen leaves, flowers, animals which you can handle without doing any harm.
Not Sherlock Holmes

Detectives in movies always hold our their magnifying glasses toward an object and look through it at arms length. Although this looks cool, it defeats the purpose of the magnifying glass. Their lenses are built to provide a specific magnification, and this functions best at a certain (usually very close!) distance from your eye. So, to view something through a magnifying glass:
- Identify (and preferably hold!) the object you want to examine
- Bring your magnifying glass to your dominant eye, maybe an inch or two away at most
- Close your non-dominant eye
- Bring the object closer to your dominant eye and the magnifying glass until the image comes into focus
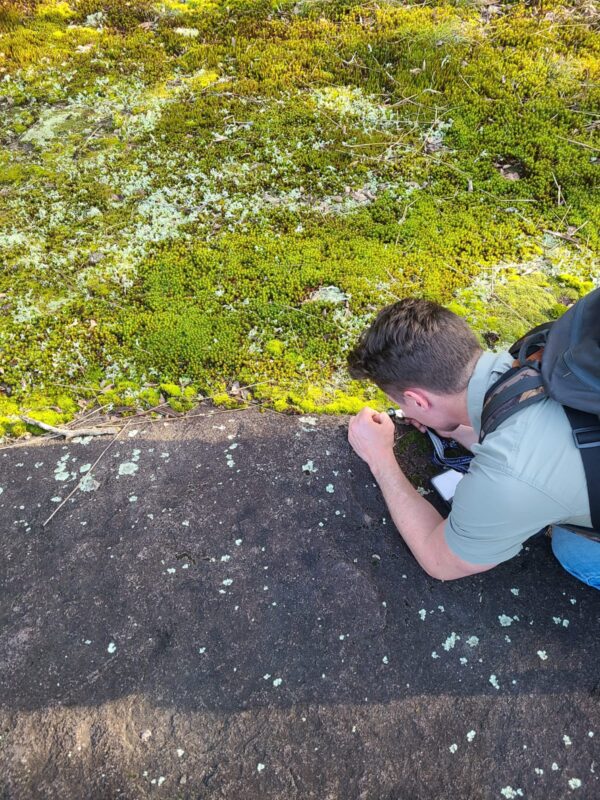
Leaning in
From there, you can turn and move the object however you need to, to get the view you want. If you want to examine something that you’re not holding, you need to be able to move yourself. For example, if you’re checking out a lichen on a tree trunk, a flower on a living plant, or a sleeping moth. If you touch or handle these things, you could harm them, so you want to look at them in place. In this case things are mostly the same:
- Identify (and preferably hold!) the object you want to examine
- Bring your magnifying glass to your dominant eye, maybe an inch or two away at most
- Close your non-dominant eye
- Lean or step closer to the object, keeping the magnifying glass the same (close!) distance from your eye, until the image comes into focus.
It’s that easy!
Go try it out!
Now that you know the basics of using a magnifying glass, go have a look for yourself! Try getting a new, closer perspective a natural object that you might be taking for granted. I have found amazing patterns in everything from bumblebee wings to acorn caps. It’s good practice for when you’re especially curious about something, and will teach you new things about the natural world around you.
If you’ve had any great micro-sightings with your magnifying glass or hand lens, I’d love to hear about it in the comments! As always, if you’d like to see any other naturalist advice on Gulo In Nature, let me know via the contact form.